Tuesday, January 24, 2012

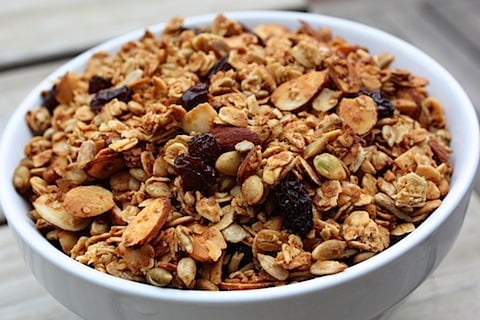
Easy Homemade Granola

If you’re looking for a great granola without all of the sugar and added preservatives—make your own! This quick and easy recipe is full of nutritious ingredients without all the extra junk! Best of all, granola is easy to modify. There really aren’t any hard and fast rules, so feel free be creative and swap out some of the ingredients!

Ingredients:

6 cups old-fashioned oats (not quick oats)
2 t ground cinnamon
4 cups shredded or flaked coconut (flaked coconut lends a “meatier” texture)
2 cups chopped almonds, pecans or walnuts
1 cup sunflower seeds or pumpkin seeds
1 cup organic coconut oil
1 cup raw honey
1 T vanilla extract
1 cup raisins (or any mixture of dry fruit)
  1. In a large bowl, mix together oats, cinnamon, coconut, along with the nuts and seeds.
  2. Heat coconut oil and honey in a small saucepan over medium heat until just melted but not hot. Remove from heat and add vanilla.
  3. Stir honey mixture into oat mixture. Pour into two large baking dishes and bake at 325 for 35-40 minutes or until oats are golden brown. Stir occasionally while cooking for even browning (keep an eye on them after 30 minutes because it can burn quickly). Remove from oven, and cool.
  4. Add raisins or dried fruit. Store in an airtight container. If you’d like to extend the life of the granola beyond a few weeks, store in the fridge.

Wednesday, January 18, 2012

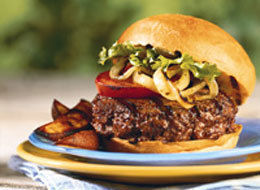
Healthy Hamburger?

“Most people think you can’t have a healthy beef burger, but you can,” says John La Puma, MD, classically trained chef and author of ChefMD’s Big Book of Culinary Medicine.

However, traditional burgers have their pitfalls. First of all, never use conventional frozen patties because they contain the same mixture of low-grade meat, fat trimmings, and chemical additives in fast food burgers. Ground beef in regular supermarkets may be produced the same way and most likely come from factory farms that give cows hormones and antibiotics.

Geez, well how do you find the best burger meat? Good question! In descending order, these are your best choices:

  1. Grass-fed; compared to corn-fed, it’s higher in protein, omega-3 fatty acids, conjugated linoleic acid, beta-carotene, and vitamins A and E. It’s also lower in cholesterol and saturated fat.
  2. 100% organic (grass-fed or not) don’t contain added hormones or antibiotics).
  3. Local (raised without hormones or antibiotics)
Lean meats take a bit of extra care to cook because you’ll want to avoid overcooking which will cause dryness. Here are some cooking tips:

  1. To avoid meat becoming too dry, you’ll want to literally stand there and watch your burgers on the grill! A burger that is just right can easily cross the line to dry city in a matter of seconds!
  2. For additional moisture, after cooking, garnish your burgers with organic cheese, avocado, lettuce and tomato.
  3. To prevent lean burgers from becoming tough, be gentle when making patties and resist the urge to over-handle.
  4. To avoid steaming rather than grilling, be sure your grill, or pan, is hot before you put the burger on. 
Healthy “Real” Hamburgers
Serves 4. Preparation time: 10 minutes. Cooking time: 10 minutes

2 tsp olive oil
2 garlic cloves, peeled
½ tsp each salt and freshly ground pepper
1 tsp dried oregano (Mexican preferred), crushed
1 lb well-trimmed grass-fed (preferably organic) beef chuck steak, ground
4 whole-wheat hamburger buns split
½ ripe avocado, peeled, seeded and cut into 8 slices
4 organic romaine lettuce leaves
4 slices organic tomato
Optional garnishes: salsa, spicy brown mustard, ketchup (without high fructose corn syrup), jardinière (Italian relish of pickled vegetables), or pepperoncini peppers

  1. Oil a grill or grill pan with the olive oil. Coarsely chop the garlic on a chopping board. Sprinkle the salt over the garlic; use the side of the knife to “cream” the garlic into a paste. Sprinkle on the pepper and oregano and mash them into a paste. Combine the mixture with the ground chuck, mixing lightly, and form it into four ½-inch-thick patties.
  2. Place the burgers on the grill or grill pan over medium-high heat. Grill covered for 5 minutes. Turn the patties; continue grilling, covered, 3-4 minutes for medium doneness. To lightly toast the bunds, place them on the grill, cut sides down, during the last minute of cooking. Serve patties in buns with avocado slices, lettuce, tomato, and optional garnishes of your choice.
  3. For big appetites, you can put two patties on one bun.
Per Serving: 326 Cal; 26 G Prot, 13 G Total Fat (3.5 G Sat Fat); 25 G Carb, 52 MG Chol, 523 MG Sod, 5 G Fiber, 4 G Sugars

Reduced-Carb Options:
Replace one-half of the bun with a slice of toasted, sprouted whole-grain bread and the other half with a romaine lettuce leaf. Or, for a bread-free version, wrap the burger in a big lettuce leaf.

For us gluten-free folks--Udi’s makes a pretty good GF burger bun.

Recipe from the book ChefMD’s Big Book of Culinary Medicine by John La Puma, MD, and Rebecca Powell Marx.

As always, bon appetite!!
Tuesday, January 17, 2012

Don’t Diet!


By now we all know (or should I say I hope we all know) that eating an extreme diet or severely restricting food choices is perhaps one of the biggest mistakes we can make if we’re trying to lose weight (and keep it off)! Although you can initially lose weight on almost any diet, the minute you go off the diet, all the weight comes back—and more! This makes long-term weight loss nearly impossible and leads to discouragement and frustration. The best way to lose weight is to adopt healthy new habits and not think of these new changes as a “diet”, but rather as a new way of eating. Start slowly by working on these basic issues:

  • Avoid fast food, processed foods, and junk foods like the plague! Replace these empty calories with real food.
  • Eat smaller portions (this is easier to do when you’re eating real food because it is more satisfying).
  • Eat more vegetables, fruits, nuts, and seeds
  • Eat more lean protein; it will help you feel full longer
  • Increase consumption of “good” fats such as omega-3’s while avoiding “bad” fats such as trans fats and polyunsaturated fats
Dieting doesn’t work because by definition it is restrictive. By focusing on what you can’t have, it sets you up for defeat. Instead, focus on adding more of what you can have and get back to basics by enjoying fresh, seasonal foods and cooking at home more often.

Monday, January 2, 2012

Mess O’ Greens Slow Cooked


If you’ve spent any time in the South, then you know what a “mess o’ greens” is! Best of all, these cruciferous veggies are a concentrated source of good health. Collards, kale, and mustard greens provide a plentitude of nutrients. They provide nutritional support for detox, and are antioxidant and anti-inflammatory. The array of antioxidant phytonutrients is quite amazing—well over 45 and counting.
A few tips to get started:

·        Always choose greens that are bright and crisp, with no yellow or brown spots and no discolored edges or small holes. Colors should be vibrant; yellow leaves mean they’re long past fresh, and have lost much of their nutritive value.

·        Store for no more than a few days. Keep them in the coldest part of the fridge in a zip-lock bag with the air squeezed out.
Recipe:
2 cups organic chicken broth
4 bunches fresh greens (collard, kale, mustard), stems removed and coarsely chopped
6 whole garlic cloves, peeled
4 green onions cut into ½ inch pieces
1 smoked ham hock or smoked turkey drumstick
½ teaspoon coarsely ground black pepper
Salt to taste

1.     In a large heavy pot, bring broth to a boil. Add remaining ingredients, return to a boil. Reduce heat to low, and barely simmer for about 1 ½ hours, stirring occasionally.

2.     Remove ham hock or drumstick; shred the meat, discarding all skin, fat and bones, and return meat to pot. Crush garlic cloves with a fork and give the whole pot a good stir.
Enjoy!

Wheat Belly; Lose The Wheat, Lose The Weight!

I don’t know if it’s just me, but I find the rise in obesity among both adults and children in the U.S. very perplexing. After reading Dr. Davis’s book Wheat Belly, I was shocked to discover that the wheat we eat today is not the same wheat that our great-grandparents consumed.  In Wheat Belly, Dr. Davis exposes the truth about modern-day wheat. Modern wheat causes blood sugar to spike more rapidly than eating pure table sugar (white sugar) and has addictive properties that cause us to ride a roller coaster of hunger, overeating and fatigue! In most grocery stores, entire aisles are devoted to bread in all its forms.  As if that weren’t enough, there are yet more aisles full of cakes, cupcakes, cookies, pies, tarts, sweet rolls, bagels, croissants, brownies, cereals, and other sweet baked goods.

And if you look at processed foods of all kinds, you’ll find wheat. And don’t even get me started on all the wheat lurking around in fast food and restaurant fare—wheat is everywhere! Wheat is the primary grain used in U.S. grain products; approximately three-quarters of all U.S. grain products are made from wheat flour.

Dr. Davis explains that modern wheat is approximately 70% carbohydrate by weight. The carbohydrate in the form of a starch is called Amylopectin A. Amylopectin A is the most digestible form and is found in wheat.  Because it is the most digestible, it is the form that most enthusiastically increases blood sugar.  This explains why (gram for gram) wheat increases blood sugar to a greater degree than other carbohydrates such as lima beans or potato chips.  The Amylopectin A of wheat products might be regarded as a super-carbohydrate, a form of highly digestible carbohydrate that is more efficiently converted to blood sugar than nearly all the other carbohydrate foods, simple or complex.

What about whole grains?  Isn’t whole grain bread better?  Not according to Dr. Davis. The degree of processing, from a blood sugar standpoint, makes little difference: Wheat is wheat, with various forms of processing or lack of processing, simple or complex, high-fiber or low-fiber, all generating similar high blood sugars.  Just as “boys will be boys,” Amylopectin A will be Amylopectin A.  In healthy, slender volunteers, two medium-sized slices of whole wheat bread increase blood sugar by 30 mg/dl (from 93 to 123 mg/dl), no different from white bread.  In people with diabetes, both white and whole grain bread increase blood sugar 70 to 120 mg/dl over starting levels.

Dr. Davis devotes a significant part of this compelling book detailing many of the health problems associated with modern wheat consumption. He also describes his clinical experience in helping many of his patients kick their wheat habit and restore not only their health, but effortlessly return to their ideal weight.  He describes the increase in celiac disease over the past 50 years.  While the most severe form of celiac is easier to diagnose, there are milder forms that manifest themselves as anything from mysterious rashes that come and go to diarrhea and other GI disturbances to arthritic aches and pains.

I agree wholeheartedly with Dr. Davis that the fat phobia of the past forty years turned people away from eating real food such as eggs, organic meats and full-fat dairy products, nuts, seeds, and healthy oils such as olive oil. But here’s the kicker, saturated fat was never the problem.  Carbohydrates in combination with saturated fat cause measures of LDL particles to skyrocket.  The problem has always been carbohydrates—not saturated fat.  In fact, new studies have exonerated saturated fat as an underlying contributor to heart attack and stroke risk.

Part three of the book is devoted to saying goodbye to wheat and creating a healthy and delicious new lifestyle by identifying and eliminating wheat in all forms. There are many tasty recipes included as well!

This book, in my opinion, is one of the most important to have in your library (and your kitchen) if you’re serious about taking charge of your health. Trust me, it’s worth it!

References:

2011 by William Davis, M.D., Wheat Belly, Rodale

http://www.webmd.com/diet/features/obesity-epidemic-astronomical


Saturday, November 12, 2011

How to Have a Healthier Thanksgiving!


With Thanksgiving Day right around the corner, you may have begun considering how you’re going to maintain a sense of self-control while surrounded by all that delicious food!  As we all know, the day is famous for its indulgences; overeating and then lounging lazily for the rest of the day watching football, napping, and spending time with family and friends.

For highly health conscious individuals, this holiday can prove to be a bit challenging. Well don’t worry, relax. I mean honestly, a once-per-year day of overeating most likely isn’t going to sabotage your diet plans. They key is to avoid destructive eating behaviors throughout the holiday season to avoid gaining unwanted pounds that will end up on your list of New Year’s resolutions!
The good news is that there are some simple changes you can make to your Thanksgiving plans this year that will save you some calories (without sacrificing taste) and add some fun to your holiday.
1. Fit it all on one plate. Prevent over-stuffing yourself by fitting your Thanksgiving feast all on one plate (This works best if you don't use an oversized plate filled to the brim). Sample small portions and avoid going back for seconds. If you're tempted to return for more, give yourself 20 minutes (about how long it takes to feel full) first.
2. Eat slowly. Thanksgiving foods are likely to be richer and more filling than your everyday fare, so eat slowly and savor every bite.

3. Enjoy the company of family and friends. Socialize during your meal and festivities. You can't eat and talk at the same time -- so the more conversation you enjoy, the less you’ll eat.

4. Get moving. Sign up for a local Turkey Trot 5K or 10K and spend your Thanksgiving morning getting some exercise. Not only will you burn some calories, but you'll also enjoy some holiday fun!
5. Make your own cranberry sauce rather than the jellied stuff and save 120 calories.
  • Cranberries (boiled in sugar) (1/2 cup): 100 calories, <1g fat
  • Jellied cranberry sauce (1/2 cup): 220 calories, <1g fat
6. Choose pumpkin pie over the pecan pie for dessert and decrease your caloric intake by 160 calories.
  • Pumpkin pie (1/8 pie): 340 calories, 15g fat
  • Pecan pie (1/8 pie): 500 calories, 25g fat
Enjoy your holiday and, as always, Bon Appetit!

Sunday, November 6, 2011

Essential Fatty Acids Really Are Essential


Fat. For so many diet conscious individuals, it's the ultimate dirty word! Yet, despite its bad reputation, the body needs the right fats; especially essential fatty acids to function properly. Fats from animal and vegetable sources provide a concentrated source of energy in the diet and they also provide the building blocks for cell membranes. One of the reasons that you’re always hungry on fat-free diets is that fats as part of a meal allow you to go longer without feeling hungry. IN addition, they act as carriers for important fat-soluble vitamins A, D, E and K. Dietary fats are also needed for the conversion of carotene to vitamin A, for mineral absorption and for a host of other processes. Essential fatty acids (EFAs) are polyunsaturated fats that are considered essential because your body can’t make them. What this means is that you must get then from the foods you eat.

Striving to consume more omega-3s can bring you closer to the ratio our ancestors ate. One way to accomplish this is with a fish oil supplement. There are many delicious foods that offer omega-3. The list below is a nice mix of plant and animal fats.

Flaxseed oil and flaxseeds, walnuts, soybeans, winter squash, Brussels sprouts, scallops, salmon, rainbow trout, crab (Dungeness), and tuna.

Monday, July 18, 2011

Grilled Salmon with Ginger and Sesame


I think this recipe is definitely one of my new favorites! The ginger adds a very unique dimension to the salmon that turned out to be quite delicious. Use more or less ginger depending on your preference. Personally, I love ginger, so I loaded up! I’ll probably add even more next time I make it.:-) Not only is this recipe very easy to make, it's really fun to show off when you’re having dinner guests!
While I usually prefer wild salmon, most wild caught is sockeye; which doesn’t work well with this recipe. I’ve found that the next best thing to wild is responsibly farmed salmon. While responsibly farmed salmon is not always as easy to find (depending on where you live), it is well worth the effort if you can locate a supplier in your area. If you have a Whole Foods within driving distance, even better! I recently made the very pleasant discovery that Whole Foods carries only responsibly farmed seafood.

Not only does Whole Foods prohibit preservatives such as sodium bisulfite, sodium tri-polyphosphate, and sodium metabisulfite in their seafood, they go above and beyond that. While there are a growing number of seafood standards out there, none are as strict as Whole Foods. They cover all the bases; from synthetic chemical use, feed, environmental contaminants, water quality, and pollution prevention, predator control and traceability. And this is just a subset of what their standards cover.

“There is no doubt that Whole Foods Market’s aquaculture standards are the strongest among all grocers. Producers who want to supply farmed salmon to Whole Foods Market must be dedicated to moving the salmon industry in the right direction. We are proud to be a part of that move.”
–Johan Andressen, Villa Organic, Norway

Ingredients:
4 Salmon Fillets (6-8 oz. w/skin on)
Pickled Ginger (available in the Asian section of most grocery stores)
2 T Dijon mustard
3 T Brown Sugar or Succant
2 T Soy Sauce
1 t Sesame Oil
3 T Olive Oil
Salt and Pepper to taste

In a medium bowl, combine the mustard, sugar, soy sauce, sesame oil, and olive oil along with a dash of fresh ground pepper. Set aside a small amount of the marinade to brush on top of the salmon before grilling. Also, remember to soak your skewers for at least 20 minutes to avoid burning. I forgot this step and as you’ll see, my skewers burned to a crisp!

Pour marinade over salmon and completely coat.

Turn skin side up and use a soft spatula to work the marinade underneath the filet. Allow to marinade at least 20-30 minutes.

Discard marinade and arrange salmon fillets skin side down and use a sharp knife to make slits crosswise in the flesh. Be careful not to cut through the skin.

Stuff each slit with as much ginger as you like.


Thread each fillet lengthwise to keep the ginger from falling out. One skewer is fine for a smaller fillet (this one was pretty big so I used two).


Brush remaining marinade on and sprinkle with salt and pepper.
Lightly oil grill grates to prevent ginger from sticking and heat to med/high. Allow the fillets to rest while you’re waiting for the grill to get hot.

Place fillets on the grill skin side down (the skin will fall off when you turn them over).
Cook for about 3 minutes on each side. Keep in mind that the cook time will largely depend upon the heat of your grill.

Remove skewers and serve with a fresh salad or the side of your choice.
As always, take care and bon appetit!  

Sunday, July 17, 2011

Caesar Salad with Homemade Dressing


As far as I’m concerned, there’s nothing quite like a Caesar salad to make a meal complete! Nothing beats a Caesar salad with fresh romaine (not bagged), homemade dressing, freshly shredded parmesan cheese, and a few anchovies. The few extra steps it takes to cut and wash your own Romaine lettuce and make your own dressing are well worth the effort. Homemade salad dressing beats bottled salad dressing any day of the week and the health benefits are well worth the extra bit of effort.  Homemade trumps because bottled dressings are almost always made with cheap, low-quality oils that have been stripped of their nutrients and rendered rancid by high-temperature processing. In addition, bottled dressings typically include stabilizers, preservatives, MSG, and refined sweeteners. The extra-virgin olive oil in this recipe is rich in omega-3 fatty acids and supplies vitamin E along with a host of wonderful antioxidants.
Crisp romaine lettuce is highly nutritious and, believe it or not, is 17% protein with 7.7 grams per head! In addition, one head of romaine lettuce contains 44% RDA of Omega-3 essential fats and has more vitamin C than an orange.

Choose bright crisp heads of romaine lettuce; avoid bunches that have rust, holes or that are limp, wilted or yellowing. It is common to find romaine that has slight browning along the very edges of the outer leaves—this is okay as long as the rest of the head looks fresh and green. Just be sure to trim the brown edges off the outer leaves.

Romaine is highly perishable; I usually store it in the fridge in a Ziploc bag. Romaine will keep for up to five days if kept dry; if wet, it likely only last a couple days.

Whenever possible, choose organic romaine because conventionally grown lettuce is often high in pesticide residue.

You’ll notice that there aren’t any croutons on this salad. The reason for this is that I’m gluten intolerant. Please feel free to add croutons for a more authentic Caesar experience!

The salad dressing recipe is from Sally Fallon’s “Nourishing Traditions” Cookbook. I hope you enjoy this as much as I did!

Caesar Dressing:

1 t Dijon mustard
1 T raw wine vinegar
1 T fresh lemon juice
1 T finely grated Parmesan cheese (plus more for garnish)

½ cup extra virgin olive oil

1 egg yolk

2 anchovy filets

1 garlic clove, peeled and mashed

Salad:

1 large head Romaine lettuce

4-6 anchovy filets


Cut off edges

Cut lettuce at approximately 1” intervals

Rinse well and be sure to inspect for any stowaway insects.
Dry lettuce completely with paper towels.


In the meantime combine all ingredients in a blender.


Store in an airtight jar for up to seven days.

Serve as a side salad, or feel free to beef it up and serve it as your main course.
Take care and, as always, bon appetit!


Friday, July 15, 2011

Grilled Strawberries


Summer fruit is one of the many reasons that I look forward to this season and every since I was a kid, strawberries have been one of my favorite summer fruits. Growing up in Southern California, I was lucky enough to have access to some of the best strawberries. Let’s face it, there’s not much about strawberries not to love! This recipe is super easy and I had a lot of fun making it.
While we all know that strawberries are delicious, they are also a nutritional powerhouse. First cultivated in ancient Rome, strawberries are now the most popular berry fruit in the world! Packed with vitamins, fiber, and particularly high levels of antioxidants known as polyphenols, strawberries are a naturally low-calorie food. In fact, they are among the top 20 fruits in antioxidant capacity and are a good source of manganese and potassium.  One cup of strawberries contains over 13% of the RDA of dietary fiber, yet has only 43 calories. The dietary fiber in strawberries helps to regulate digestion and curbs overeating. Thanks to the vitamin C, folate, and flavonoids, strawberries are a delicious defense against potentially cancerous cells. If that weren’t enough, one cup of strawberries contains an incredible 136% of the RDA of vitamin C!

A few tips:
Be sure to soak your skewers in water for at least 20 minutes to avoid burning. If strawberries are straight from the fridge, set out on the counter and allow them to arrive at room temperature before preparing. Also, be sure to clean your grill grates well before making these. If you don't, the strawberries will end up tasting like whatever you grilled last (like a steak). I learned this the hard way!

Recipe:
1 lb. Strawberries (preferably organic)
1T Balsamic Vinegar (more if needed)
1 pinch (less that ¼ t Himalayan Sea Salt)

Succant (dried cane sugar), or any organic sugar you’d like. Use as much as you need to completely coat the berries.


First, preheat grill to Med/High. Wash and dry strawberries then cut the tops off.
Add Balsamic and sprinkle with salt
(start with 1T Balsamic and add more as needed to completely coat berries)
Use a large soft spatula to gently toss the strawberries. Be sure to cover every nook and cranny.
Roll individually in sugar

Thread skewers.
Grill for about 1-2 minutes on each side. Stay close to the grill so you can keep an eye on them; the cook time will depend largely on the heat of your grill and the size of the strawberries.


Remove promptly and serve immediately.
These are great right off the grill; not so great the next day..:)
I hope you enjoy these as much as I did!
Take care and, as always, bon appetit!

Sunday, July 10, 2011

The Truth About Salt


Salt is essential for the survival of all living creatures, including us humans!  The bad news is that commonly used table salt is highly refined which makes it extremely unhealthy and toxic. The table salt and cooking salt found in most homes, restaurants, and all processed foods, is empty of any nutritional value. It is lacking in the precious trace minerals that make salt good for us. After processing, salt is basically sodium chloride which is an unnatural chemical.  Commonly sold table salt is composed of 97.5% sodium chloride and 2.5% other chemicals like iodine and sugar. Table salt is also dried at more than 1,200° Fahrenheit; the excessive heat destroys many of the natural chemical structures that occur naturally in salt. In order for our body to metabolize this chemical table salt, it must waste tremendous amounts of energy to try to keep the body at an optimum fluid balance. This creates an unnecessary burdening of the elimination systems in the body. When we ingest this type of salt, our body cannot dispose of it in a natural, healthy way. This can lead to inflammation of the tissues, water retention and high blood pressure over time. Studies show that for each gram of table salt that your system cannot process, your body will use over twenty times the amount of cellular water to neutralize the sodium chloride in chemically-treated salt. Over-consumption of table salt causes many untold health problems.

What our body really needs is natural pure salt! Natural salt is needed to regulate the water content in our body.  This is the reason that I always use Celtic Sea Salt or Himalayan Salt in my recipes.

But what about high blood pressure? Yes, it is true that salt causes high blood pressure. However, it is the toxic table salt that is the culprit—not natural salts like Celtic and Himalayan.

Celtic Sea Salt is the naturally moist salt harvested from the Atlantic seawater off the coast of Brittany, France.  This type of salt is harvested using the Celtic method of wooden rakes allowing no metal to touch the salt. It is naturally air and sun-dried in clay ponds and gathered with wooden tools to preserve its living enzymes.  Because it is unrefined, it contains all of the 84 beneficial live elements found in sea water, with no chemical and preservatives nor any other additives. Among the live minerals and trace elements found in Celtic sea salt are iodine, iron, calcium, magnesium, manganese, potassium and zinc. The 84 trace minerals provide the necessary nutrients and protect the body from the harshness of sodium chloride that we consume from commercial salt. The appropriate magnesium content ensures that unused sodium is quickly and completely eliminated from the body through the kidneys to prevent harm. Celtic sea salt has tremendous healing virtues that have the exact opposite effects of refined salt.  It helps to balance out and nourish our body with minerals that our body lacks.  Celtic sea salt has been shown to actually normalize blood pressure.

Next up is Himalayan Salt! Himalayan salt is far superior to traditional iodized salt. Himalayan salt is a pure form of salt, untouched by many of the toxins and pollutants that pervade other forms of salt. Himalayan salt contains the same 84 natural minerals and elements found in the human body. There are many health benefits of Himalayan salt. First, it helps control the water levels within the body, regulating them for proper functioning. It also promotes increased absorption capacities of food within the intestinal tract. Choosing to use Himalayan Salt as an alternative can have a big impact on your total health and well-being.

Both Celtic Sea Salt and Himalayan Salt are available in most health food stores. Some larger grocery chains are starting to carry Celtic Salt, but if you can’t find it in your area, there are several online retailers that carry both salts.

If you’re accustomed to using table salt, you’ll notice the difference in taste immediately. Both salts are rich in flavor and you’ll only need to use a fraction in your recipes. Typically I use about half the amount of salt that most recipes call for because a little goes a long way!

Take care and, as always, Bon Appetit!

Tuesday, July 5, 2011

Grilled Steak Kabobs with Mango


I’ve recently acquired an obsession with Mangoes. I mean, seriously, I can’t get enough of them! I’ve tried them in several recipes and then it crossed my mind that they’d probably be super yummy served warm. Hmmm…this curiosity inspired me to try adding them to a grilled recipe. I wasn’t sure how they’d turn out, so I’m very pleased to say they turned out great! The medley of red peppers, red onions, mangoes, and top sirloin turned out to be quite a treat.

As if being delicious weren’t enough, this tasty fruit has lots of health benefits too! Mangoes are very beneficial for the tummy because its enzymes help aid in digestion.  Mangos are also high in soluble dietary fiber which helps to lower serum cholesterol levels.

If at all possible, choose grass fed beef if the option is available to you. Why? Grass-fed is more nutritious and tasty! Also, switching from grain-fed to grass-fed meat is simply returning to a diet that is most in harmony with our physiology. One of the major benefits of raising animals on pasture is that their products are healthier for you. The old saying “you are what you eat” is true for animals as well!  Every cell and system of the human body functions better when we eat products from animals raised on grass. Grass-fed beef is naturally leaner than grain-fed beef and is rich in Omega 3 fatty acids. In addition, grass-fed beef is loaded with natural minerals and vitamins. Beef, in its natural grass-fed state, is a health food of the highest order. If you’re not convinced, that’s okay. Try this; purchase both and do a side-by-side comparison. If this doesn’t win you over, please let me know!
Ingredients:
1 lb. Top Sirloin (the lb. is not an exact measurement; I probably used about ¾ of a lb.)
1 Ripe Mango
1 Small Red Pepper
1 Small Red Onion
2 T Olive Oil
1 T Soy Sauce
1 T Dijon Mustard
1 T Balsamic Vinegar
2 T Red Wine
1 t Celtic Sea Salt or Himalayan Pink Salt
¼ Fresh Ground Pepper
Combine the last seven ingredients into a large bowl (this will be your marinade and glaze). Mix well and set aside enough of the marinade to brush kabobs.
Cut the steak into 1” cubes and place in the bowl and marinate for at least 30 minutes.

Peel and cut mango into 1” cubes (they won’t be perfect—that’s okay)

Core red pepper and cut into 1” squares

Cut onion into 1” squarish chunks and keep the layers intact

Thread the skewers

Brush on marinade and sprinkle with fresh pepper. In the meantime, heat the grill to med/high and allow the kabobs to rest while you're waiting for the grill to get hot.

Grill kabobs for 2-3 minutes on each side if you'd prefer medium rare (shorten or lengthen the cook time to suit your taste). Keep in mind that the cook time will largely depend on the heat of your grill.


Serve with a fresh salad or the side of your choice
As always, bon appetit!  

Sunday, July 3, 2011

Mango Salsa


I absolutely love Mangoes! They are so delicious and easy to work into recipes. This salsa is very easy to make and can be used as a relish for seafood dishes or served as a side dish.

As if being delicious weren’t enough, this tasty fruit has lots of health benefits too! Mangoes are very beneficial for the tummy because its enzymes help aid in digestion. Mangos are also high in soluble dietary fiber which helps to lower serum cholesterol levels. Some of the many health benefits of cucumbers include their high water content (about 95%), their fiber-rich skin and their levels of potassium and manganese, which help regulate blood pressure and help promote nutrient functions. The silica in cucumber is an essential component of healthy connective tissue, which includes muscles, tendons, ligaments, cartilage, and bone. Jalapeno peppers aid in weight loss; these peppers contain a chemical known as capsaicin. Capsaicin aids in weight loss by helping your body burn calories and fat. So embrace that hot feeling! Lime has an irresistible scent which waters the mouth and the compounds found in this fruit stimulate the digestive system and increase secretion of digestive juices.

Ingredients:
1 Ripe Mango
½ Cup peeled and diced cucumber (approximately 1 small or ¾ med. cucumber)
¼ Cup red onion diced (about ½ of a small red onion)
2 T + 1t Fresh squeezed lime juice
1/3 Cup finely chopped cilantro
1 small jalapeno pepper (yields about 1 heaping tablespoon)
½ t organic cane sugar
¼ t Himalayan pink sea salt or Celtic sea salt

Combine all ingredients and gently stir with a spatula. Avoid using a spoon or fork to stir the ingredients because this can mush the mangos. If possible, make the salsa a few hours in advance and allow it set in the fridge for a few hours, this will allow the flavor to develop nicely.

Tips:

If you can’t find ripe mangos at the grocery store, simply ripen them on your countertop. Don’t allow them to become overripe because they will be too mushy and difficult to handle.  I recommend purchasing two because, as I’ve learned, you’ll probably want to nibble on the mango as you’re slicing it…just sayin. This also leaves you room for error if you end up with too many oddly shaped chunks.

The recipe itself is super easy. The most time consuming task is chopping the cilantro, because you’ll want to carefully remove all the stems and discard any nasty looking leaves. The Whole Foods market I frequent usually has chopped cilantro leaves on the salad bar.  If your local grocery store has this option it is a huge time saver! If not, it is still well worth the effort to chop your own cilantro.

Also, keep in mind that the measurements for the cucumber, red onion, jalapeno, and cilantro need not be exact. I usually end up with a heaping measurement of all of the above. After you make it once, you’ll have a better feel for which ingredients you’d like more (or less) of.

Wednesday, June 29, 2011

Easy Greek Salad Dressing


This salad dressing is super quick and easy to make! Best of all, homemade salad dressing beats bottled dressing any day of the week! The health benefits of homemade dressing are well worth the little effort it takes to make. The reason that homemade trumps is because bottled dressings are almost always made with cheap, low-quality oils that have been stripped of their nutrients and rendered rancid by high-temperature processing. In addition, bottled dressings typically include stabilizers, preservatives, MSG, and refined sweeteners. Homemade dressings on the other hand are much healthier if made with extra-virgin olive oil. Olive oil is rich in omega-3 fatty acids and supplies vitamin E along with a host of wonderful antioxidants. Studies prove that olive oil provides numerous health benefits. If the oil has been processed correctly, it will still contain its original content of antioxidants, which protect the oil's fatty acids form rancidity. Along with olive oil, I always add a tablespoon of flax oil to my salad dressings; unrefined flax seed oil is one of the best vegetable sources of omega-3 fatty acids. If you can get your hands on Barlean’s Organic Flaxseed oil, it is considered one of the best in terms of quality, purity and health benefits. Homemade salad dressing is very easy to make and with a little practice, you can learn to make your own dressing without measuring.

Recipe:
¾ cup extra virgin olive oil (preferably organic)
1 T organic expeller pressed flax oil
1 t Dijon mustard (smooth or grainy)
2 T raw Apple Cider Vinegar
1 T Fresh squeezed lemon juice
2 garlic cloves (pressed)
½ t basil
½ t oregano
¼ t sea salt
¼ t fresh ground pepper
2 heaping T Feta Cheese

You can make this dressing in a matter of minutes! Simply measure out all your ingredients and place them directly into a glass jar with a very tight lid. Shake the jar vigorously and refrigerate overnight to allow the spices to soften and the flavor to develop.


Take care and, as always, bon appétit!

Tuesday, June 28, 2011

Homemade Kimchi


This year, I’ve embarked on a journey to restore my digestive health. Along the way, I’ve learned about the important role that fermented foods play in healthy digestion and this has turned out to be an important key in my healing. In fact, the results have been nothing short of miraculous! I’ve started making more of my own fermented foods and lacto fermented beverages and I must admit that Kimchi is one of my favorites.

Kimchi (Korean Sauerkraut) is undoubtedly one of the healthiest foods you can consume. Kimchi shot to fame after recently being named one of the top five healthiest foods in the world! There are hundreds of varieties of Kimchi. but the most common varieties are made with Napa cabbage as the base along with green onions, garlic, carrots, and ginger. The definition of fermentation is “breaking down into simpler components.” Fermentation makes foods easier to digest and the nutrients easier to assimilate. In essence, much of the work of digestion is done for you in advance. The process of fermentation also imparts probiotics. What are probiotics? They are good bacteria that aid in digestion and elimination. The active cultures that pre-digest the food as part of the fermentation process also generate nutrients. Additionally, you’re getting powerful antioxidants from the garlic, ginger and onions. There are a host of wonderful live enzymes kept intact by the fermentation process. Best of all, Kimchi promotes intestinal health by feeding the lacto-bacteria and bifida-bacteria that live in your intestines (these are the friendly bacteria.)

Most homemade Kimchi recipes are very spicy…a bit too spicy for me. After experimenting, I came up with this recipe which is very mild (I used a sweet red pepper instead of a chili pepper) If you’d like a bit of spice, feel free to add ½ teaspoon dried chili flakes. Or, if you'd like a truly authentic experience, get your hands on a few Korean chili peppers!

Ingredients:
1 head Napa cabbage, cored and shredded
1 bunch green onions, chopped
1 cup of carrots, grated (about 4-5 carrots)
1 sweet red pepper
1 T freshly grated ginger
5 cloves garlic, peeled and minced
1 T celtic sea salt
¼ cup whey (if you’d like to learn how to make whey, please see my “How to Make Whey” post)


Place all the ingredients in a large wide-mouthed mason jar and add the cabbage a handful at a time. Massage mixture with your hand to release the juices and combine well.


Pound with a wooden spoon to release juices.


After combining all the cabbage, pack the mixture down firmly with your fist.


Cover tightly and leave at room temperature overnight (or at least 8 hours).


In the morning, you’ll notice that a lot more of the juices have been released. Now you’ll want to transfer into a smaller jar and leave at least one inch of headroom because the Kimchi will expand as it ferments.


Leave on the countertop for 5-7 days before transferring to the fridge. At day one or two, you’ll know the fermentation process is underway when you start to see small bubbles throughout the mixture. Also, you may hear a slight gurgling sound; this is the oxygen being pushed out. These are signs that nature is busy working! 

As always, Bon Appétit!